ProBotDev Event Chatbot allows you to create chatbots for events from Google Calendar, and it only takes a few minutes to set up. This guide will show you how.
Why do I need a chatbot for my event?
Your attendees will have questions, and finding small bits of information on a website during the event can be frustrating. Forget apps, nobody wants to download an app for a one- or two-day event.
A chatbot is perfect for events—people can just ask. Your attendees will be happy to get prompt answers, and you will be happy because they are happy without the extra manpower.
Why ProBotDev Event Chatbot?
There are many DIY chatbot builders available, but they usually require you to design a conversation flow. To use a film-making analogy, you need to write the script yourself. Not everyone is a storyteller, and—as an organizer—it’s not the best way of spending your time.
With ProBotDev, the “script” is already written and you only need to fill in the blanks. It sounds limited, but in most events, everyone tends to ask the same questions.
How do I start?
Your attendees will be chatting with your chatbot on Facebook Messenger, and for that, the chatbot needs to have a Facebook profile, just like us humans. The profile is actually a Facebook Page, the same one used for brands. In other words, the chatbot will be the automated answering machine for the Page.
If you don’t have one already, go ahead and create one.
Don’t forget to click “Add a Button” and choose “Send Message”. Click “Next” and choose “Messenger” (it should be the only choice). Click “Finish”.
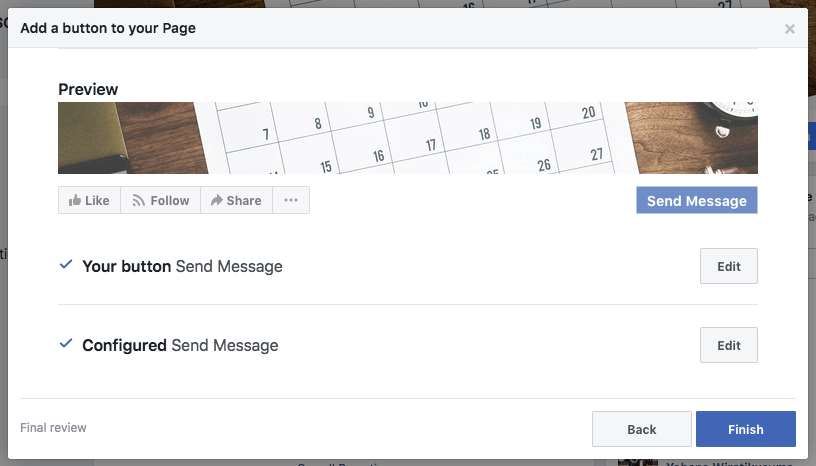
Adding "Send Message" button to your Page.
Your chatbot can also be available on other platforms, just like we humans can have accounts in various social media. As of this writing, ProBotDev supports both Facebook Messenger and LINE. We’ll cover LINE in the follow-up article.
I have my Facebook Page. Now what?
Go to ProBotDev Event Chatbot and click “Get Started”. After you’re in, go to “Settings” for the “Default Account” and link both Facebook and Google. After you have linked your Facebook, select the page you just created.
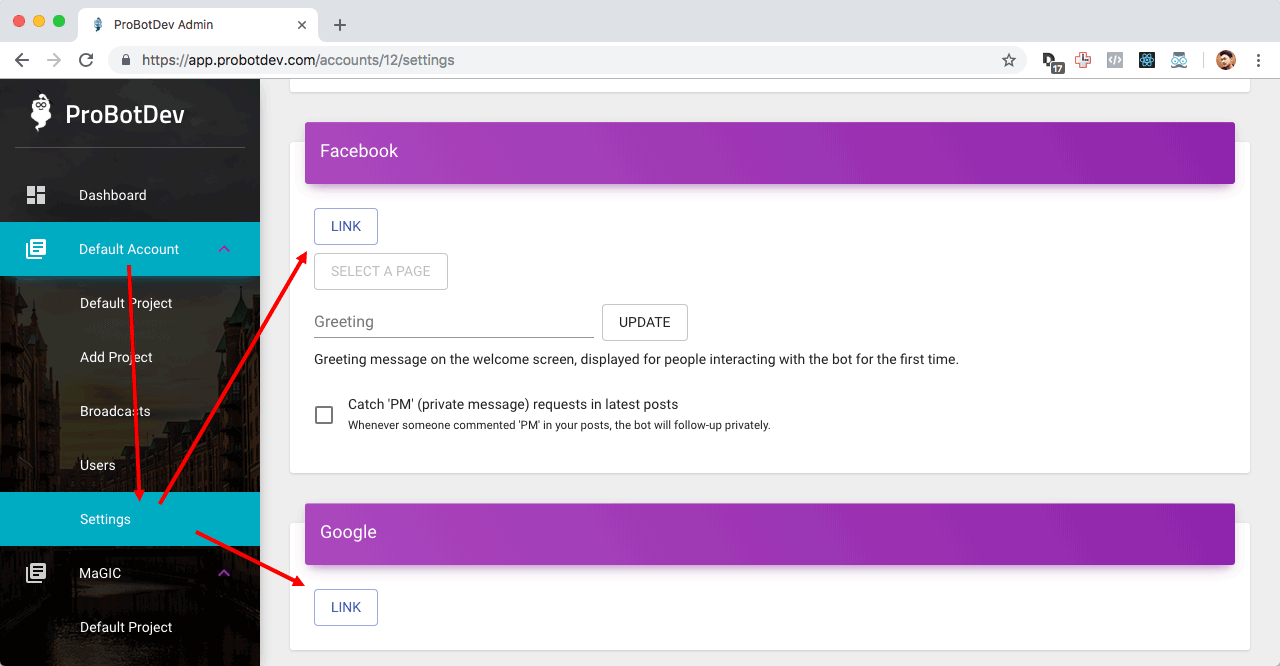
Account settings.
You should also set the greeting message, which is shown the first time someone wants to chat with your chatbot. As shown in the screenshot below, you can use the special token {{user_first_name}} in the message to display user’s first name. You can change this anytime.
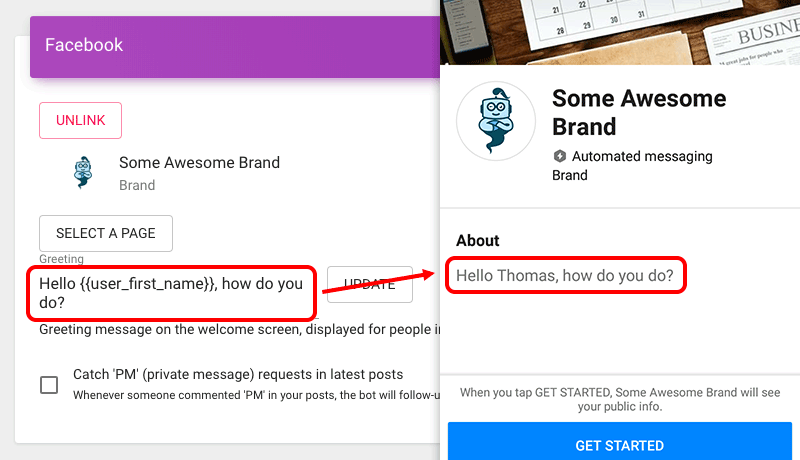
Greeting message for Messenger.
Once you have set the page, head over to your Page’s settings and set the app roles according to the screenshot below:
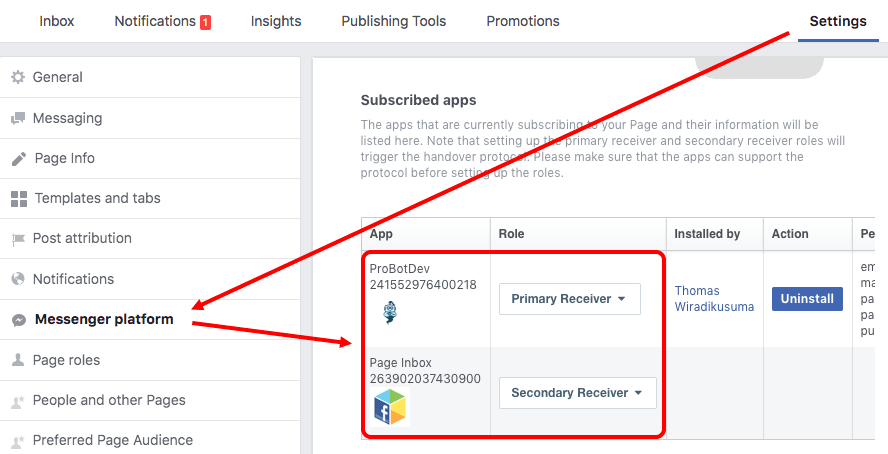
Assigning app roles in Facebook Page.
With this configuration, all interactions will be handled by the chatbot, but when someone wants to talk to a human, the chatbot will pass the conversation to the admins of the Page.
Your Page is now attended by a chatbot, but it doesn’t know anything. Let’s change that.
Calendar-powered Event Chatbot
Your chatbot knows about your events from reading a calendar. We don’t want to mix our personal calendar with the event’s, so let’s create a new one in Google Calendar.
If you’re not ready to create one, use the calendar I created (but it’s read-only)—the events are recurring weekly so you can use it anytime.
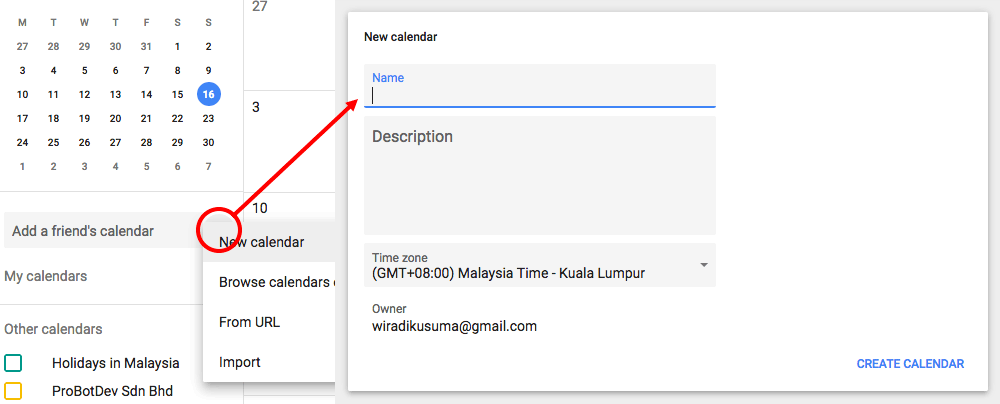
Creating a new calendar in Google Calendar.
Call it something descriptive, and don’t forget to set the time zone correctly to where the event is going to be held, not where you are.
Next is to add some events.
At a future date of your choosing, add a new full-day event. This will be the “master” event, and it can span days. It can also be a recurring event (for example, it’s a monthly meetup).
Next, add more events within the master event. These will be the schedule, such as “Registration” from 8 to 9 in the morning, and so on.
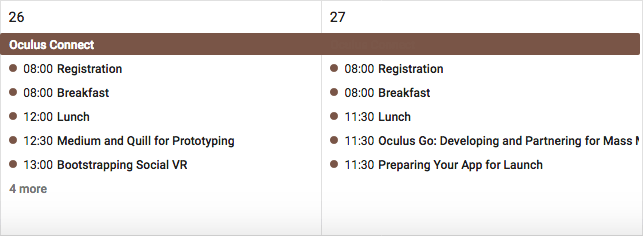
Event master and details.
Once you have a calendar with the events laid out, head back to ProBotDev Event Chatbot. Open “Default Project” and select the calendar.
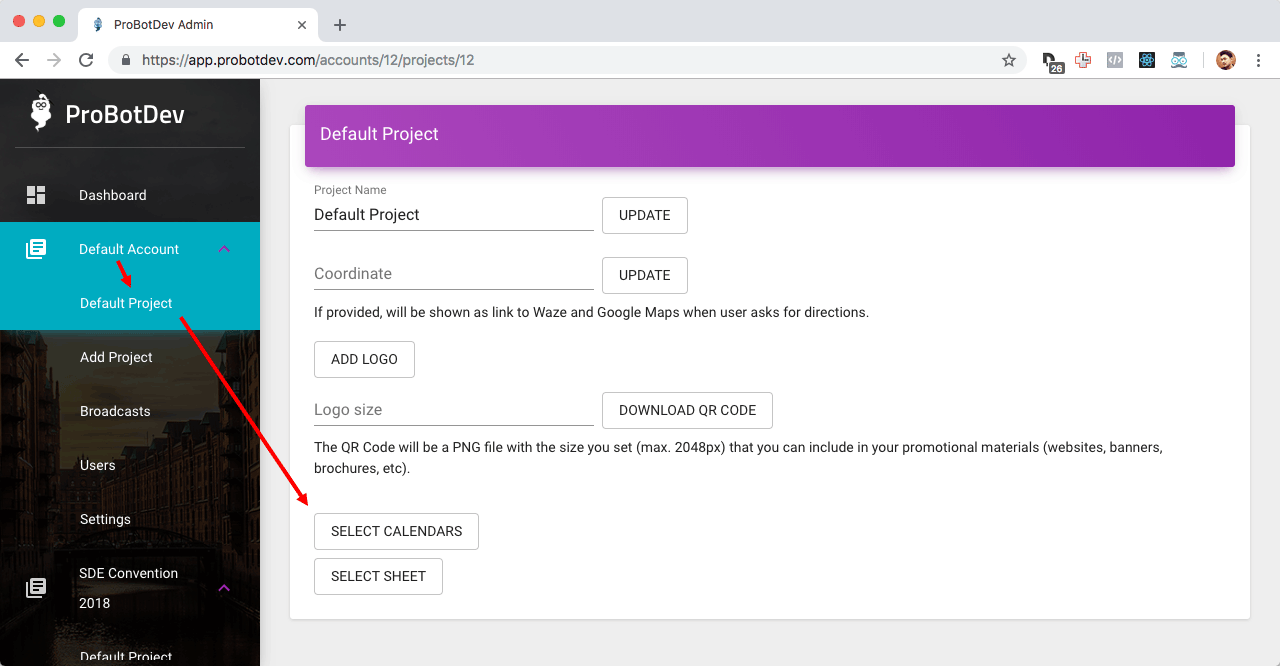
Selecting a calendar.
You can update your calendar any time, and the changes will be sync’ed automatically. Sometimes Google doesn’t push the updates immediately, so ProBotDev periodically checks for changes few times a day.
Chatting with Your Chatbot
Open your Page and click “Send Message” to try your chatbot, or search for your Page name in Messenger.
Immediately after clicking “Get Started”, the chatbot will greet you with a menu.
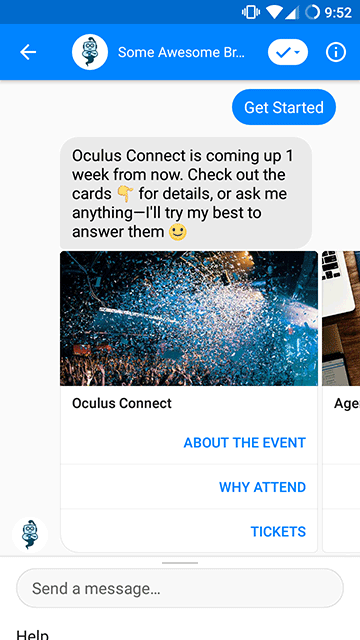
ProBotDev Event Chatbot in action.
We haven’t taught the chatbot how to respond to most of the menu items, but you can click (or type) “Upcoming” to see the chatbot showing your events.
To reset the whole experience, delete the conversation. If you just want to see the menu again, type “Help”.
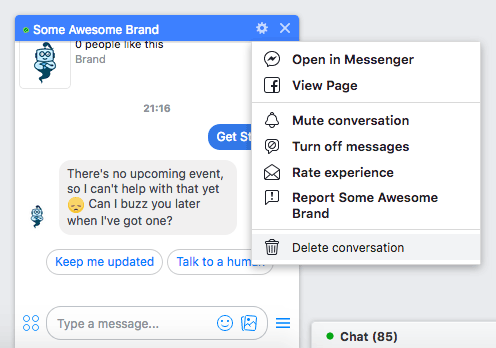
Delete Messenger conversation.
That’s all it takes to deploy your first chatbot!